This post contains affiliate links. As an Amazon Associate, I earn a small commission on qualifying purchases you make via links on this site, at no additional cost to you.
I have always had a word wall in my classroom, ever since my very first year of teaching.
That first year, my word wall was a tiny, dusty mess of too many words stuck up with thumbtacks, squeezed into not enough space on a bulletin board high up in the back corner of my room.
Guess how often it was used?
Yup – NEVER!
Can you relate?
I quickly realized that it wasn’t worth the upkeep. What’s the point of adding new words to a place my students would forget was even there?
My students couldn’t see the words, they couldn’t reach the words, they couldn’t use the words… I’m not even convinced they actually knew the words were even there.
Well, I am a problem solver, and I realized after that first year that my word wall situation was a problem I had to solve.
I needed a word wall that my students could actually USE – one that was interactive, central, big enough that I could easily fit all the words we needed, and attractive enough that my students would be inspired to go and check it out.
I decided to take the plunge and try converting my big whiteboard at the front of the room to a word wall.
It was risky because I felt a bit panicky about losing all that “teaching” space.
But, since I took that plunge, I have never looked back. My word wall has remained on my whiteboard, even after moving classrooms this year.
Interested in seeing what it looks like?
Read on to see how I set up my word wall now!
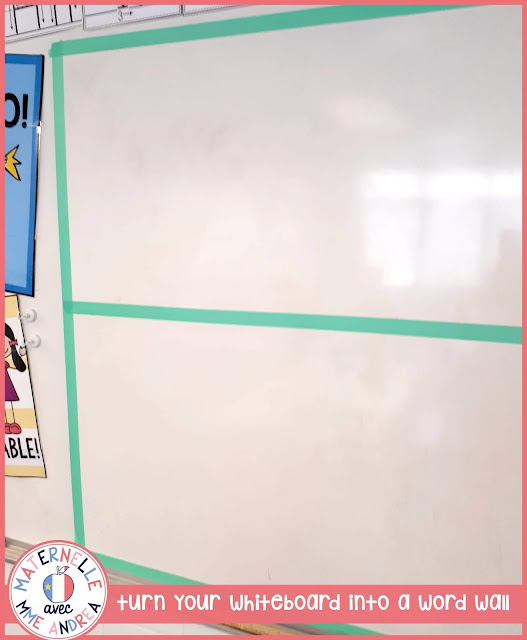
PREPPING YOUR SPACE
I use almost my entire whiteboard for my word wall now, but in the past, I would leave a chart paper-sized rectangle in case I needed to stick up a poster or do a little bit of teaching up front.
This year, I moved classrooms and the front of my room where the whiteboard is located isn’t ideal for teaching, so I just went ahead and used the whole thing as my word wall.
Once you decide how much space your word wall will need, use masking tape to make a large rectangle. Inside the rectangle will be your new word wall!
Here is an affiliate link for the kind of tape that I use.
I need two rolls to get my whole word wall done.
I need two rolls to get my whole word wall done.
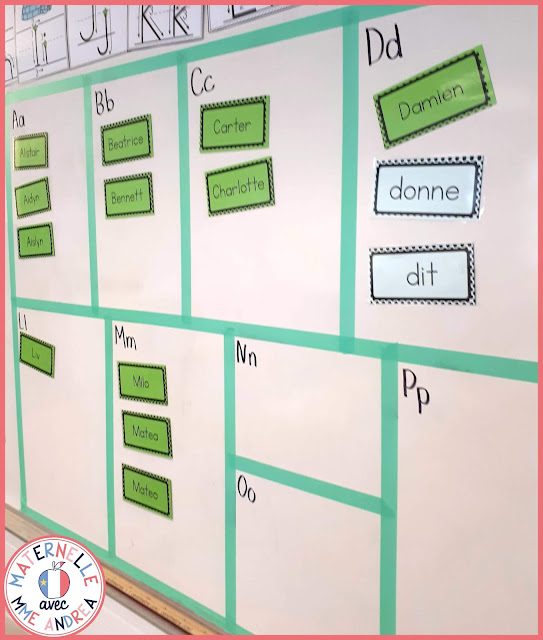
I divide the big rectangle into two long sections by putting another strip of tape horizontally along the middle.
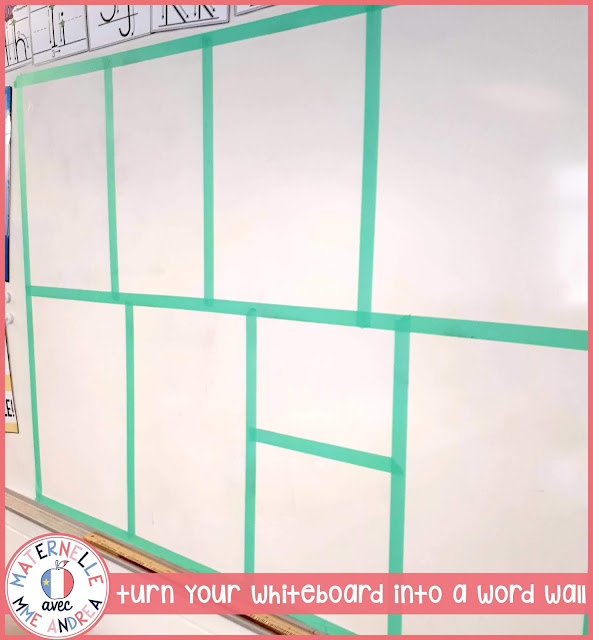
I add vertical strips of tape to create boxes. I make one box for each letter, but I vary the sizes of the boxes depending on how many words we will typically learn for each.
(For example, we learn about 0 sight words for w, x, and z each year, so their boxes are small. But, we learn a ton of words that begin with a and l, so those boxes are bigger.)
ADDING LETTERS
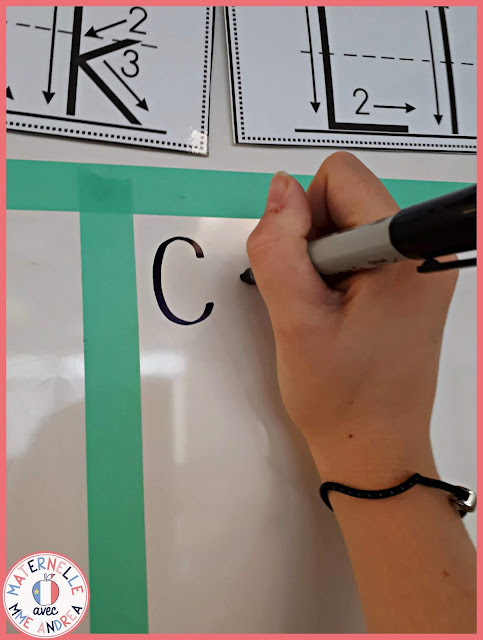
I write the letter for each box right on my whiteboard using a black Sharpie*.
It actually comes off easy peasy. Just colour over each letter with a whiteboard marker at the end of the year and erase (or have your students do it!).
Students always end up anonymously erasing letters written with a whiteboard marker, and in my humble opinion, taking the time to print out pretty letters and stick them on just isn’t worth the time or the headache when they all start to fall down and/or get lost.
(Been there, done that!)
Just write them up there once with a Sharpie and you are set for the whole year!
ADDING YOUR WORDS
With the exception of student names, I only add words to our class word wall as we learn them.
In September (and most of October), my students’ names and my own name are the only words on our word wall.
Then, when I teach a word to the whole class, we add it to the word wall.
I print my words on cardstock from Michael’s and laminate them using these laminating pouches*.
My words all have magnetic tape* on the backs, so they are easy to put on and pull off.
During our writing block, I model how to go and find the word on the wall, take it back to our spots, write it, and then return it.
Sometimes I have to model it approximately 100 times before it sticks for everyone 😉
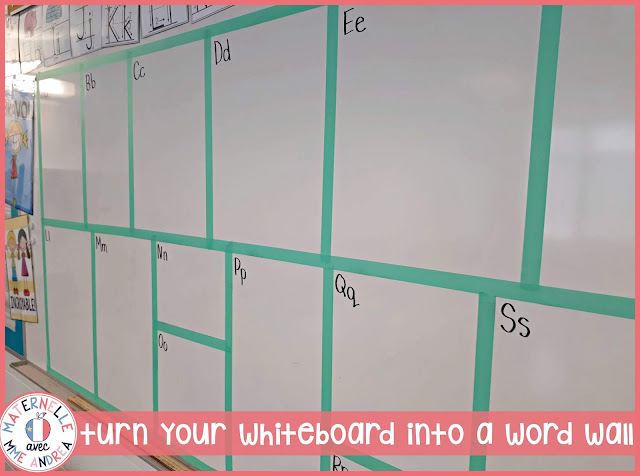
Here is what our word wall looks like all set up:
IF YOUR WHITEBOARD IS UP TOO HIGH…
This year, I moved classrooms.
Before I moved rooms, I was told that the whiteboard could be moved down to a low enough level that my students would be able to reach it (it was a high school classroom previously).
Well, someone made a promise they couldn’t keep because apparently, the whole wall will have to be demolished in order to move the whiteboard down, as the tracks are in the cement!
(which is probably not gonna happen anytime soon 😉)
I firmly believe that there is no problem that can’t be solved, so I asked for a stage to be built instead.
It still isn’t ready, so for now, we are just using a step stool to help us reach our words, but it should be ready pretty soon.
Functioning, interactive word walls are SO VALUABLE and can make a huge difference for our students.
Even if you can’t use your whole whiteboard as your word wall, or have someone build you a stage, do whatever you can to make sure that you aren’t left with a dusty and forgotten word wall hiding in a corner somewhere, like mine was.
I would love to see what your word wall looks like, and how you are making it work in your classroom!
Snap a pic of your word wall and post it on Instagram. Don’t forget to give me a tag (@mme.andrea). I am always looking for new ideas and ways to improve, and LOVE peeking inside of other teachers’ classrooms!
PS – Are you a member of my FREE Resource Library for French primary teachers? If not, what are you waiting for?? Sign up below for access to every freebie I’ve ever made… and will ever make!

