Here I am… a day late! I forgot when I planned last week to blog on Monday that I would in fact be in Halifax watching the greatest hockey team in the NHL (the Ottawa Senators) kick some Toronto Maple Leaf butt. It was a belated birthday present and it was super fun!
Go Sens Go!!!
If you missed last week’s post, I am doing a little series on my blog all about centres and how I run them in my maternelle classroom. Last week I talked about how I launch them in the beginning of the school year. And now, without further ado…here is a post all about how I organize my centres/rotations in a way that allows my students to be completely autonomous…
Or as autonomous as possible for a group of 4- and 5-year olds haha!
Keeping your centres organized (and keeping your organization consistent) makes life waaaaaaaay easier. It also really helps your students become more independent – I very rarely have to tell my students where to go and what to do…I just show them where to look in order to figure it out on their own.
As I mentioned
last week, you only have 5-7 minutes to teach your students something new before each rotation. You don’t want to spend all of those minutes telling your students what to do and where to go! Once my students are able to stay at their station for about 10 minutes and have behaviour expectations down pat, I move into teaching them about how our centres are organized.
Here are my top four tips!
1. USE BASKETS, BINS, DRAWERS, ETC…AND LABEL THEM!
My first tip for you is that baskets, bins, and drawers are your friends.
Use them!!!
I actually use all three this year, but I must say that bins are my favourite. If I had the shelf space, I would use bins for all of my centres. Here are what my bins look like:
They are just white bins…I have no idea where they are from. They were in my classroom before I was! But they are the perfect size to house all the materiel (including recording sheets and writing utensils) that we need for each centre. They are easy to transport and easy to put away. All “loose parts” are easy to keep track of.
I have 10 centres to choose from in total, but only have 8 on the go each time (I have 17 students in groups of 2-3). Having 10 total allows us to take a little break from a certain centre if needed. Bins allow me to keep all 10 centres prepped and ready to go, and my students always know where to grab their bins from. Here is a picture of the side of my shelf where my bins live:
On the other side of my shelf are baskets (or smaller bins, technically?). These are for fine motor practice – two of my centres are actually geared towards play/fine motor skills. Students can choose from the three blue baskets if they are at the blue fine motor centre, or from the three “red” (we all know they are really pink… haha) baskets if they are at the red fine motor centre.
They may work alone or with their partner, so one group may have 1-3 bins on the go at a time. To keep all of the small parts separate, it made more sense to me to have three smaller baskets for each of those centres. Hope that makes sense to you, too! I will go into more details about what kinds of activities are in those baskets in another blog post.
Finally, my last four centres are housed in drawers. These are GREAT for saving on space, but can be challenging for young students. They are hard to get in and out. They are also only a couple years old and are already cracked in a few places. Often when we clean up, I just ask my students to leave their drawer on the floor if they can’t get it in right away, and I go back and put them in their places later. But, I don’t have the shelf space currently to put those centres in bins, so the drawers are better than nothing! They are also nice and deep and fit a lot in them.
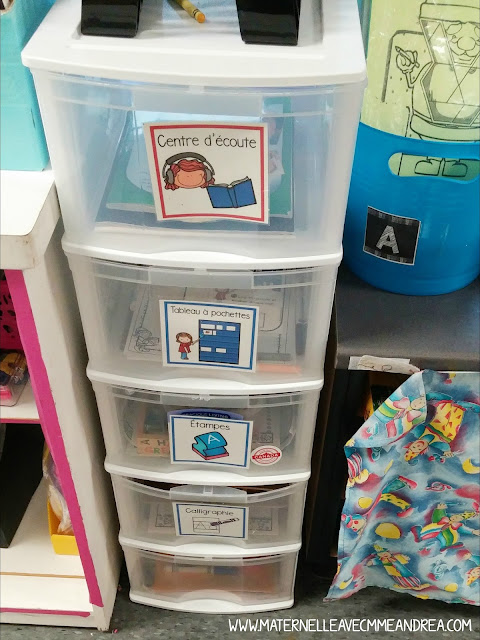
|
| I should add that this picture and the Calligraphie centre are from last year – I have the other fine motor centres and a binder centre instead this year. I currently house our writing materials for the writing centre in the fourth drawer instead. |
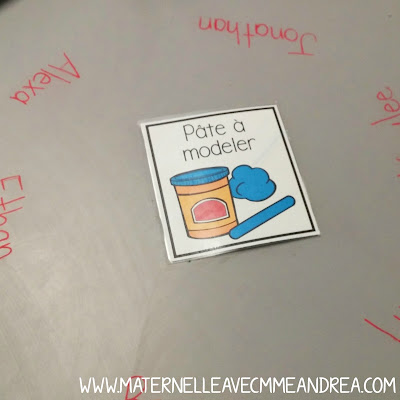
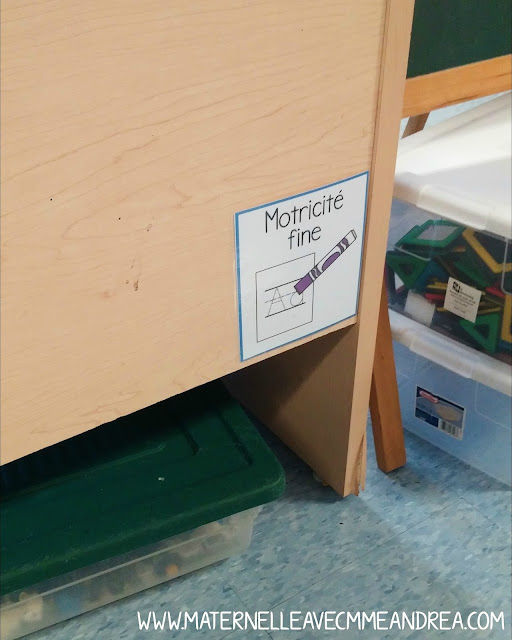
You will notice that all of my bins, baskets, and drawers are LABELLED.
These labels are key to my system!!!
You will see them later on in this post again, so take note ;)
2. HAVE ANOTHER BASKET…
For your students to put their work!
My students all come back to the carpet before their next rotation. I forgot to snap a picture, but I have a plain, grey basket at the carpet with 3-4 highlighters in it. As my students are cleaning up, if their centre had a recording sheet, they bring it to the carpet, WRITE THEIR NAME with the highlighter, and pop it in the basket.
Even if you never actually LOOK at the work they do during centre time, you will easily be able to tell who is producing something and who is wasting their time/getting off track. It helps keep them responsible and reminds them that they need to be doing what you ask.
I tell my students that I have that basket because I can’t possibly look at ALL of their great work between centres… so I keep it in that basket and look at it after school.
Do I?
Honestly, only when I am searching for quality work to show the class as an example of what I want. I have a lot of things to look over at the end of each day, and centre work is low on my priority list. If it is high on yours, that’s awesome! With a basket, you will have a great place to keep it.
Here is a little tip…approximately every four weeks, I build time in before a rotation and I pass back all of the work that’s in the basket. It’s usually about 5-6 sheets per student – not all of my centres have recording sheets. I get them to sit in a circle with their take-home folder, and I pass it out as quickly as possible. If they lose focus before I finish, I stop, they do their next centre, and then I continue passing it back before the next rotation. If there is no name on it… I put it in the recycling bin.
Sorry…ain’t nobody got time for that!
If they cry, well…they will remember to write their name next time haha. Plus they can go get it themselves later ;) This system makes it SO EASY to see which kids aren’t giving you any work – they won’t have any papers to take home! You can then have a nice little chat and remind them of their jobs during centre time.
3. LABEL YOUR CLASSROOM, TOO!
By this I mean, label
where it is that you want your students to do each centre.
With the same picture that is on the labels. If you have my
centre labels set, I suggest using the largest image for each centre to label your classroom. Most of mine I stick right on the wall/furniture, but if I want my students to work at a table, I pop the label right on the table.
 |
| Right in the middle of the table! |
 |
On the corner of my desk – students work on the floor in front of my desk
|
 |
| This one is right beside the tapis – my students listen to a story at the carpet |
My students are all responsible for finding where they are supposed to be working. I love not having to tell them where they have to go! I also love that I can easily separate noisier centres from quieter centres, and ensure that no two groups are working too close together.
4. USE A CENTRE BOARD…WITH MORE LABELS!
Consistency is key, guys! I LOVE my centre board. I have a picture for each centre… and a picture of each student, all in a pocket chart (it is actually two cheap-o pocket charts from Michael’s side by side). Students go to the centre beside their picture…simple! They can look at the picture beside their face, find the bin/basket/drawer with the same picture, and take it to the place with the SAME PICTURE.
I have no idea why it took me four years to work that all out, honestly haha!
I blocked out their sweet little faces for privacy, but you can see that they can easily tell which centre they are to go to, and who is in their group. I even let them take the image with them over to the shelf to find their bin if they need to! When it is time to rotate, I just move every centre picture down one and I say “you know what to do!”…and they do it haha. Keeping their photos in a pocket chart makes it super easy to switch students into different groups if needed, as well.
The toilet picture (don’t judge my drawing skills haha) is there because I don’t want them interrupting me to ask to go to the bathroom…but of course I need to know where they are. The rule is, only one girl and one boy can go at a time and you can only go ONCE in the morning…if you have already gone, too bad! They just put their picture beside the toilet picture. If there is already someone of the same gender gone, they have to wait till they come back and move their picture back up.
We haven’t had any accidents yet! #success
If you use
my centre cards for your centres too, I use the small labels for bins/baskets/drawers and my centre board, and the big labels to label where I want them to work. If you would like to use my cards but don’t currently own them, you can find them on TPT by clicking
HERE, or on the image below. In the coming weeks, I will be going into more detail on what core centres are, and what exactly they entail. I will also explain how I group them and what I do when I am ready to start pulling groups for guided reading…but we won’t be ready for that for a few more weeks!
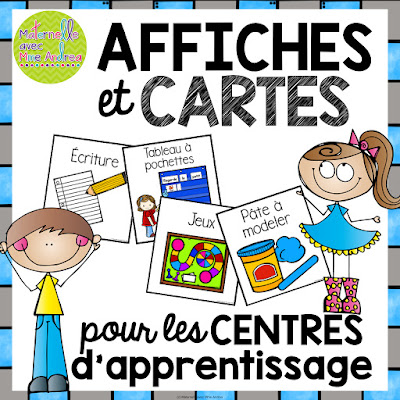
My
centre cards on TPT include labels for 19 different centres, plus there is a blank, editable template where you can add your own words/images in case I missed something.
**If you were a subscriber to my newsletter prior to September 20th, 2016, be sure to check your email before purchasing! If you need the editable page, just reply to the email!**
PS – Are you a member of my FREE French Resource Library yet?? If not, just enter your name & email below and hit the button. I’ll send you the exclusive password and instructions for getting your hands on every freebie I have ever made – and will ever make!