Hey everyone!
In case you are late to the party, I have been sharing how I run literacy centres in my classroom over the past few weeks. You can find out how I start centres in this post, how I organize them over here, and see ALL of the centres I have posted about so far by clicking here. Also, don’t forget that you can access all of the freebies that you see in any of my posts by signing up for my Free French Resource Library – right HERE!
One great centre that is easy to set up and maintain without a lot of extra prep is the Read-to-Self centre (Lecture à soi). It can take a lot of modelling and practice up front, but the investment pays off.
By taking the time to teach your students that they can ALL already read, you can help your students find joy and success in this centre. Books are magical! One of my favourite sayings is about how there is really no child who actually hates reading – there are just children who haven’t yet found the right books. It is our job to help them learn how to find the right books, teach them that they can read anything they want, and guide them to discover the magic of lecture à soi!
Read on to see my suggestions for how to get started.

First of all, consider doing whole-group practice in a workshop format prior to turning Lecture à soi into an independent centre. Some of your kindergarten students may know next to nothing about books – they may have never opened one before, they may not know how to treat a book with respect, they may not know how to turn pages carefully, etc. I generally base my lessons around the assumption that my little sweeties all know nothing about books, and teach accordingly (obviously many of them DO know about books, but this way all of my bases are covered).
For 3-4 weeks, I teach quick mini lessons, and then send my students out with tubs or baskets of books to use to practice what I have taught them. We usually do this before our two “normal” centre rotations – I tell them that it is like a centre, but everyone is doing the same thing. I always, always start our first lesson with creating an anchor chart about what it looks like to take care of books, and what someone looks like who is mean to books.
I make sure that they know that our books are PRECIOUS, and must be taken care of! I plan to make a product for TPT that explains this more deeply someday, but my to-do list is very long at the moment!
Here is an example of what kinds of lessons I would teach in the first week:
1. Being kind vs. being mean to books (anchor chart)
2. How to correctly take out and put back books in our baskets (no wrinkled pages, etc.)
3. The correct way to hold a book and turn the pages (right side up, turn at the corner)
4. We read books from front to back (turning pages in the right direction)
5. Being respectful during reading time (quiet like a mouse, read the whole time, be kind to your books, don’t disturb others, etc. – anchor chart)
We continue looking at more print concepts in the following days – parts of a book, reading left to right/top to bottom, words vs. letters vs. sentences, etc. I also teach them to look at the cover and the images within a book to decide if it is something they are interested in reading – if not, that’s okay!
 |
| I like to provide each of my students with their own baskets, but have also grouped my students around bigger book tubs in the past (3-4 to a tub). Both work well! |
It is important to also teach them that there are three ways to read a book – and EVERYONE can do at least one of them! I teach my students that they can read books in the following ways, and then provide them with time to practice each:
1. Read the pictures
I model to my students how to tell a story using the pictures in a book. I have a few wordless books (Pancakes for Breakfast and Good Dog, Carl!) that work perfectly for this lesson. I show them two possible ways to do it… naming the parts (Dog. House. Baby. Crib) and telling the story using book language (One day, Mommy had to go to the store. She left Carl in charge of the baby!), and ask them which is more interesting. Most children are natural storytellers, and do a great job telling stories rather than naming the parts! This can of course be more difficult in their second language, but is a GREAT opportunity for practice.
2. Read the words
Obviously in the beginning of the year, your students won’t know many (if any) words! However, if you do shared reading with very simple Level 1 texts, they may be able to rely on their memories to read the words, if you have smaller versions of the same books that you can put in their bins.
Otherwise, I tell my students to be detectives and look for the sight words that we have learned so far in the books they read. It is good practice for them to start looking at and thinking about the words in their books. Luckily, the sight words that we learn in the beginning (c’est, le, etc.) are very common and found in most books, so they feel successful right away! Later on, once we start guided reading, I provide them with books for their baskets whose words they CAN read.
3. Retell a story that you already know
There are two ways to do this one. You can provide your students with books that tell stories that nearly every child in the country is familiar with – Cinderella, The Three Little Pigs, Little Red Riding Hood, etc. Fairy tales and fables work great, as do books adapted from Disney movies. I have some of my own, and our school library has lots more.
You can also place books that you used for lecture à haute voix in your students’ baskets. These are generally very popular, and my students LOVE retelling the stories that we read together – especially simple ones like Non, David! and Pat le chat. These are also great because your students have heard you read them, so they will imitate your tone and intonation – a great way to start building fluency.

I also recommend choosing wisely and purchasing and/or borrowing beautiful, engaging books that suit a wide variety of interests. Yes, this can be expensive. But the cost of children not enjoying reading seems bigger to me! I use the Scholastic Bonus Bank program and coupons to supplement our classroom library, but also find many books on Kijiji, in the school library, and in my town’s public library.
My most engaging books I keep on our main bookshelf, and my students are allowed to pick one to take with their basket if they choose. Most of these books are I Spy books, Disney stories (or other popular characters that they know), non-fiction books with real photographs about topics that interest them, board books or books with interesting textures/shapes, and also school yearbooks. The yearbooks are the most popular! Even reluctant readers get super engaged while pouring through the pages, looking for familiar faces and family members.
 |
| This is my bookshelf. It is a huge headache! A goal of mine is to one day be able to afford to order a shelf where the books face the front like this, but where the shelves are wooden instead of cloth! |
You should also consider your classroom library set-up, and decide what is important to you and what works best for you. A quick Pinterest search will show you lots of different classroom libraries! You may need to get creative, depending on the size and layout of your classroom. My library used to be tucked away in a quiet corner. It was nice and quiet, but… no one ever used it unless they had to for centres!
Now, my library is in the middle of the room. There are a few more distractions, but it is used much more often. If quiet is your priority, then you should find a place for it that is quiet. If you want books to be front and centre, then put them front and centre. I don’t believe that there is a right or wrong way to set up your library, as long as your kids find it warm and inviting – do what is best for you and your students!
I have also collected a few chairs and cushions over the years, as well as a nice rug. Some were parent donations, and some were super on clearance from places like Superstore and HMV! Just keep your eyes open and ask around :)
Another thing to consider is how to store your books and which books you want your students to access. As I said above, I have one communal shelf with our most special books. My students also each have their own book baskets. They keep their reading bags in their basket during the day (and take them home for homework each night). Also in their baskets are a mix of books that I have read aloud, and levelled readers that they can read on their own. I keep 3-4 books in their reading bags at a time, so when I switch them out, they add them to their basket to read during Lecture à soi.
You could also have your students share tubs, based on their reading groups.


A final way to keep your Lecture à soi centre engaging and fresh is to consider adding other reading activities. For example, you could have a bin of flash cards to practice letters or sight words. You could include any big books that you read to the class during shared reading, or if you have an iPad with an app or other resource that reads to students or shows books, you may consider making that accessible during Lecture à soi.
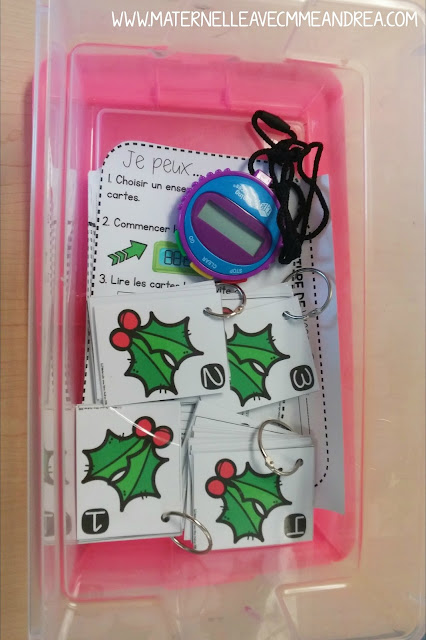
If you look in the picture above, you will see a bin with a pink cover. Inside it is one of my students’ favourite activities – Lecture de vitesse. I used to have this be its own centre, but this year I tried including it with Lecture à soi, and it has been a success!
In the bin are four “lists” (10-12 flash cards held together on a binder ring), a stopwatch, an I Can card, and recording sheets.
This is our first crack at it, so all four lists currently in the bin are just for practicing letters. Later in the year, I will add sight word lists and fluency phrases. Students choose a list, and one partner is in charge of the stopwatch. The other partner reads the cards as fast as they can. They record their time and switch jobs. They switch again and again, and try to beat their time! Later in the year, I will provide a second stopwatch, and students will time themselves.
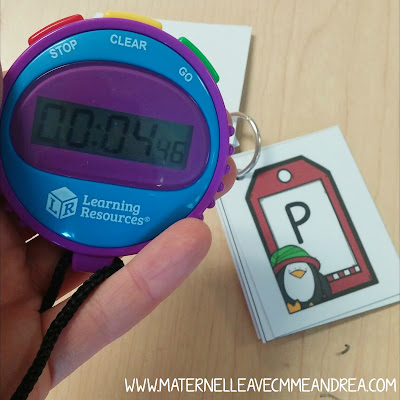
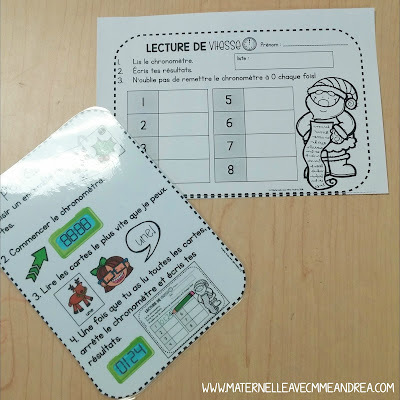
For whatever reason, a stopwatch makes everything more fun!
If Lecture de vitesse is something that you want to try in your classroom, I have themes for all year long in my TPT store, as well as a money-saving bundle. Just click on the links above to check them out!
I also have a FREE version of Lecture de vitesse in my Free French Resource Library, that contains cards for upper- and lowercase letters. It has a Pet theme, so you can use it any time of year! Just print, laminate, cut, and attach your lists together using binder rings.
If you aren’t currently a member of my Free French Resource Library, just CLICK HERE, enter your name and email below and click on the pink button. I’ll email you the password + access instructions right away!
Each of the full sets include nine sight word lists and fluency phrases as well as alphabet cards, and each group of fluency phrases builds on the list before (the same nine lists are in each set). That way, students can find the list that is the best fit for them, and try to progress to a harder list with each theme. I will be blogging more about how I teach and how my students practice sight words next week. After that post, I have just ONE MORE post to go in my centres series!
If you still have any questions about centres that I haven’t answered, please post them below in the comments, or fire me an email at andreamfancy@gmail.com. I would love to answer them in my final post!